Ooma End User Portal
The Ooma End User Portal allows you to listen to voicemail, check your call logs, and update the preferences for your Ooma Office extension, all from within your web browser. You can even send faxes and phone calls directly from the portal to increase your productivity.
Accessing the User Portal
Logging In
To log in, navigate to (http://office-au.ooma.com, and follow the steps below to access your account:
- Click on “For Users” to bring up the screen shown below:
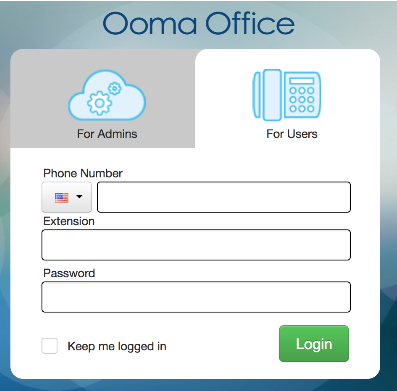
- Choose your country’s flag from the dropdown menu, and enter the main phone number for your business in the “Phone number” field
- Enter your extension number in the “Extension number” field
- Enter your password in the “Password” field
- Click “Login” to log in
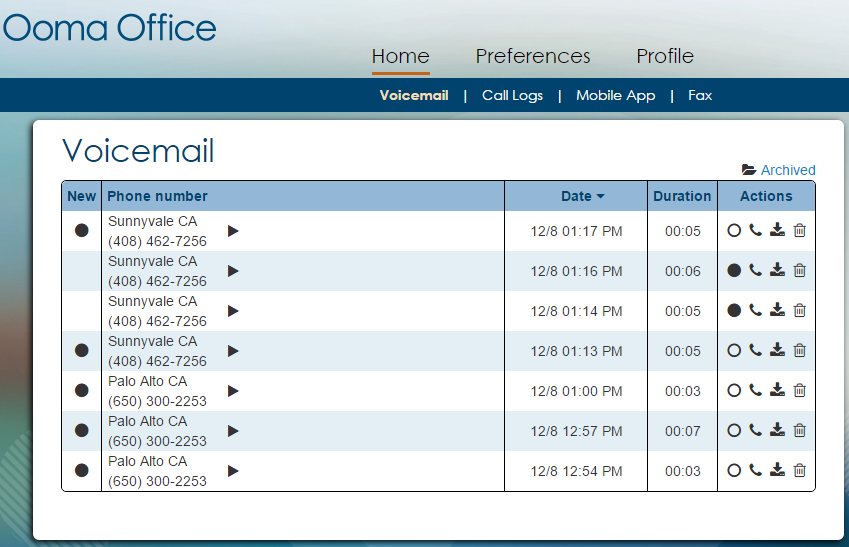
Once you are logged in, you will see the Voicemail screen as your landing page:
Logging Out
To log out, click on your username in the top right corner, and then select Sign Out from the dropdown menu.

Making a Call
To use the Click to Call feature, enter any phone number that you want to call in the text box at the top of the screen next to your username and then click the Call button.

Your Ooma Office extension will start to ring. Answer your extension to connect the call.
You can dial internal extension numbers, Australian phone numbers, or international numbers (e.g., 00 followed by country code and phone number). Keep in mind that if you dial international numbers additional charges may apply.
Voicemail
Listening to Voicemail
To listen to a voicemail message, navigate to the Voicemail page by clicking the Home button.
New messages are marked with the  icon. Click the Play button (
  ) next to the message you want to hear. The message will begin to play through your computer’s speakers.

Once a message has completed playing, you can:
- Click
 to mark the message as new
 - Click
 to return the call
 - Click
 to download the message
 - Click
 to delete the message
When you download a message, it will be stored on your computer as an MP3 file.
Call Logs
Viewing your Call Logs
To view your call logs, navigate to the Call Logs option under the Home tab.
By default, you will see your call history for the last week.
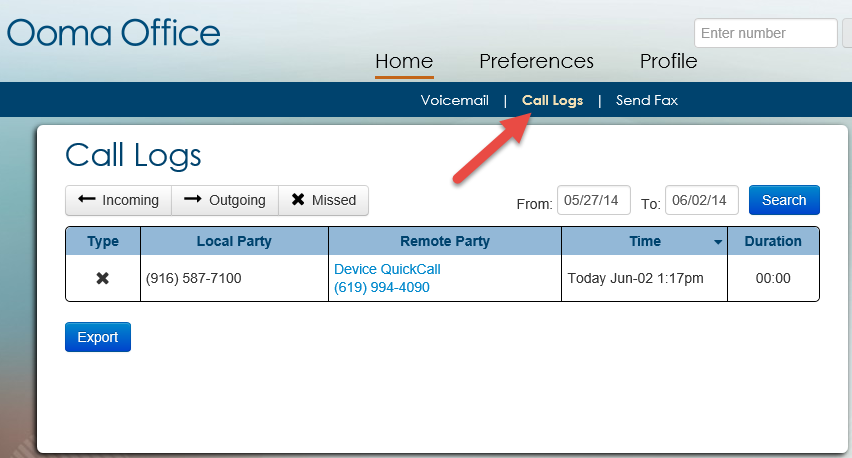
You can perform the following actions from the Call Logs interface:
- Click
 to view your incoming call logs.
 - Click
 to view your outgoing call logs.
 - Click
 to view your missed call logs.
Enter a date range within the From and To fields, and then click Searchto display a list of call logs for that date range.
 - To export your call logs, click the Export button. Your call logs will be saved to your computer as a CSV file (which can be opened in Microsoft Excel and other spreadsheet programs).
Faxing
Sending a Fax
To send a fax, navigate to the Fax option beneath the Home tab, and then click on the “Send Fax” option.
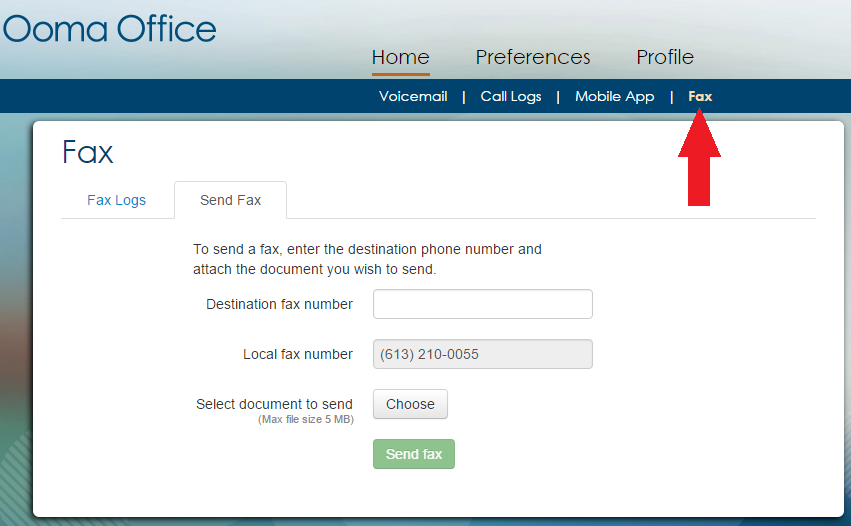
- Enter the destination fax number in the Destination fax number field.
-
Click Choose and select the file you wish to upload from your computer. You may send files in PDF or TIFF file format.
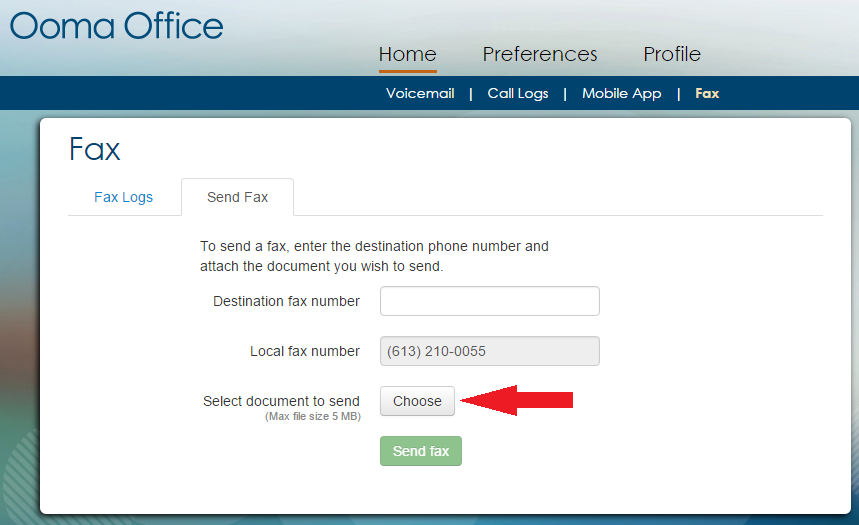
- Click “Send fax”.
Preferences
Voicemail Preferences
To access your voicemail preferences, navigate to the Voicemail option beneath the Preferences tab.
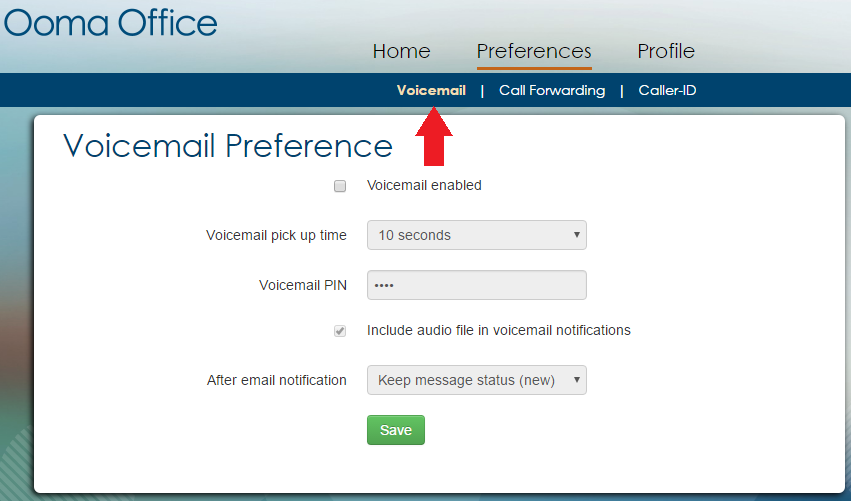
From the Voicemail Preferences interface, you can do the following:
- Uncheck the Voicemail enabled checkbox if you wish to disable voicemail on your extension.
- Adjust how long you want your extension to ring before sending an incoming call to voicemail.
- Change your voicemail PIN by entering a 4 to 8-digit number. This PIN is used when you access your voicemail remotely.
- Check the “Include audio file in voicemail notification” checkbox to attach an MP3 audio file of each new voicemail message to voicemail notification emails.
Click the Save button to save your settings.
Call Forwarding Preferences
To configure your call forwarding preferences, navigate to the Call Forwarding option beneath the Preferences tab.
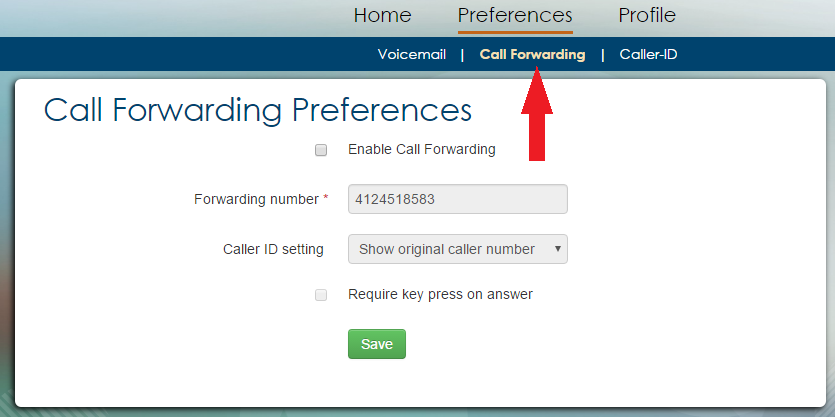
From the Call Forwarding Preferences interface you can do the following:
- Check the Enable Call Forwarding checkbox if you wish to enable call forwarding for your extension.
- Enter the phone number that calls will be forwarded to in the Forwarding number field. You must supply a phone number to enable call forwarding.
- Check the Simultaneously ring local extension checkbox if you want your office phone extension and your forwarding number to ring at the same time when calls are forwarded. You can answer from either location when this option is enabled.
- Check the Require key press on answer checkbox if you want to be prompted to press 1 to answer a forwarded call. Turning this option on prevents your calls from being sent to your cell phone’s voicemail if you don’t answer, if your cell is turned off, or if you do not have a signal.
Click the Save button to save your settings.
Caller-ID Preferences
If your extension can be reached by dialling multiple phone numbers, then you can manage your caller ID preferences by navigating to the Caller-ID option beneath the Preferences tab.
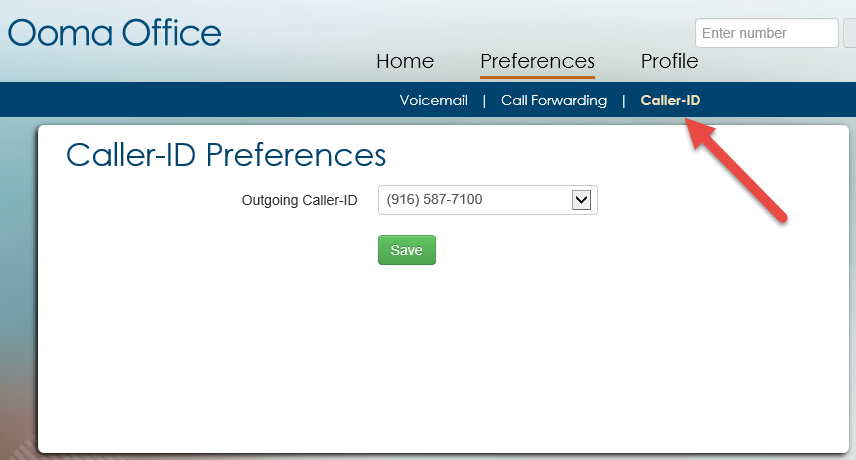
From this interface, you can select which phone number you want to use as your outgoing caller-id from the “Outgoing Caller ID” drop down. This is the phone number that other people will see when you call them.
When you are done, click the Save button to save your settings.
Profile
Changing your Profile Settings
To update your user profile, select the Profile option on the menu bar.
Note: Only your Administrator can change your Name or Extension Number.
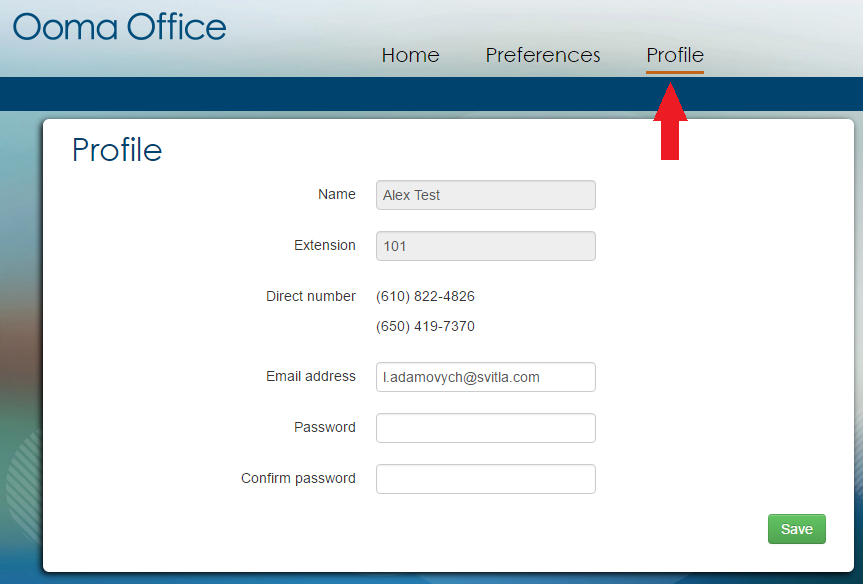
From the Profile interface, you can do the following:
- Enter the email address associated with your extension in the Email address field. This email address will be used for Voicemail Notification emails.
- If you want to update your password, enter it into the Password and the Confirm Password fields.
Click the Save button to save your settings.